Kitchen island design ideas for Long Island homes.
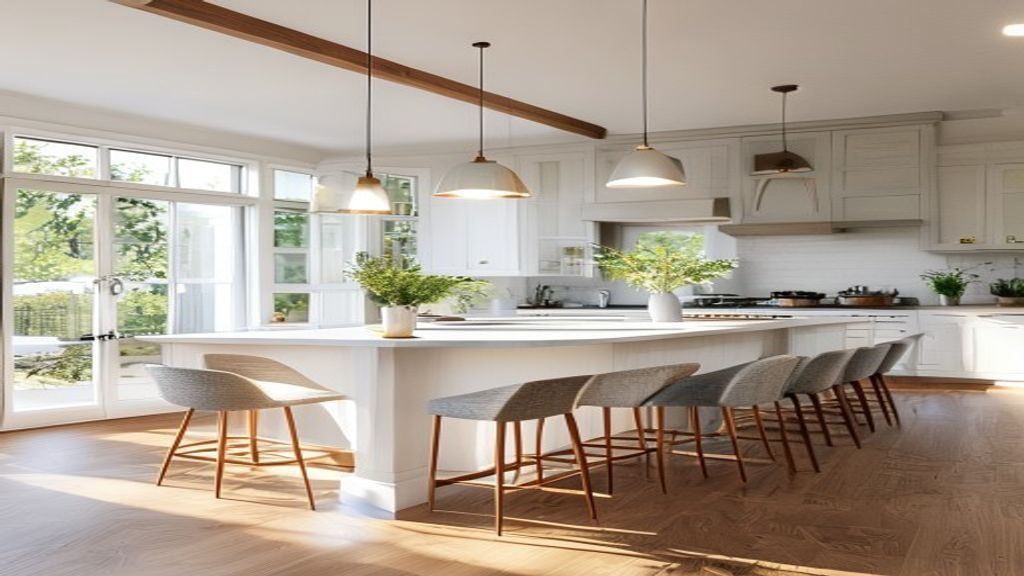
Ask any Long Island homeowner what they want most from a kitchen remodel and, more often than not, the answer is an island. It's the piece everyone gathers around — where kids do homework, where guests end up during a party no matter how big the living room is, and where a surprising amount of the actual cooking happens. Done right, a kitchen island earns its footprint every single day. Done wrong, it becomes an obstacle you squeeze past a hundred times a week.
The difference is almost always in the planning. Below are the design decisions that matter most for the kitchens we see across Suffolk and Nassau — from compact Levittown ranches to larger colonials in Islip and Huntington — and the honest trade-offs behind each one.
Start with clearances, not the island itself.
The most common mistake is designing the island first and the walkways second. It should be the other way around. Before you fall in love with a size, measure what's left over. As a working rule, you want at least 42 inches of clear floor between the island and the surrounding counters — and 48 inches if two people cook at once or if that aisle also holds the dishwasher or oven, since those doors need room to swing open with someone standing there.
This is where a lot of Long Island kitchens run into trouble. Many original mid-century layouts simply aren't wide enough for an island without stealing space from somewhere else. If your kitchen is under about 13 feet wide, a full island may not fit comfortably — but a peninsula (an island attached at one end to a run of cabinets) or a rolling cart often delivers most of the benefit without choking the walkways.
Size and shape: match it to how you actually cook.
There's no universal "right" island size — the right one is the largest that still leaves you generous clearances. That said, a few patterns hold up well:
- The prep-and-gather island. Around 4 to 7 feet long with an open counter and seating on one side. This is the workhorse for most homes: room to roll dough, land groceries, and seat two or three people without committing to a second sink or cooktop.
- The double-duty island with a sink or cooktop. Moving the sink or range to the island opens up the perimeter and turns your back to the wall while you work. It's fantastic for entertaining, but it adds plumbing or electrical and ventilation runs — real work, and worth planning carefully.
- The two-tier island. A raised bar section hides prep clutter from view and creates a natural spot for stools. It costs more in countertop and cabinetry, but for open-concept kitchens where the island faces the living room, it keeps the "lived-in" side out of sight.
Shape matters too. A long, narrow island suits a galley-style kitchen; a squarer island fits a wider, more open footprint. Avoid making an island so deep (front to back) that you can't reach the middle of the counter — anything past about 4 feet deep usually needs access from both sides.
Seating that people will actually use.
Island seating is one of the features homeowners are happiest about after the fact — if the dimensions are right. The two numbers that make or break it are overhang and stool spacing.
- Counter-height seating (36-inch counter): plan for roughly a 12-inch overhang so knees fit under. Use 24-inch-tall counter stools.
- Bar-height seating (raised to 42 inches): a 12- to 15-inch overhang and 30-inch stools. The raised bar hides dishes but sits a step higher.
- Elbow room: give each seat about 24 inches of width. Cramming four stools into a space meant for three is the fastest way to make seating no one wants to use.
A quick reality check: measure the length of usable overhang, divide by 24, and that's roughly how many people fit comfortably. It's almost always fewer than homeowners first assume.
Storage: make the island earn its keep.
An island is prime real estate for the storage a Long Island kitchen never seems to have enough of. Some of the most useful configurations we build:
- Deep drawers instead of doors for pots, pans, and mixing bowls — far easier to reach than a deep base cabinet you have to crawl into.
- A pull-out trash and recycling bin near the prep zone, so scraps go straight from cutting board to bin.
- Open shelving or a bookcase end on the side facing the room — a spot for cookbooks, baskets, or barstools to tuck under.
- A microwave or beverage drawer built into the island base to free up counter space elsewhere.
- An appliance garage or charging drawer to keep the countertop clear of clutter.
Custom cabinetry is where an island really separates itself from a stock one, because the interior can be built around exactly what you own. If that's the direction you're leaning, our custom cabinets and countertop pages walk through the material and finish options in more detail.
Lighting, outlets, and the details people forget.
Two or three pendant lights over an island are close to a design cliché at this point — because they work. Hang them roughly 30 to 36 inches above the countertop so they light the surface without blocking sightlines across the room. For a longer island, three smaller pendants usually read better than two large ones.
Just as important and far less glamorous: electrical code requires receptacles on most islands, and you'll want them anyway for mixers, laptops, and phone chargers. Modern pop-up or under-counter outlets keep them off the visible face of the cabinetry. Plan these early — retrofitting an outlet into a finished stone island is not a small job.
What drives the cost of a kitchen island.
Islands range from a straightforward cabinet-and-counter build to a full second work zone, and the price follows the scope. The biggest factors we see on Long Island projects:
- Utilities. Adding a sink means plumbing and drainage; a cooktop means gas or electrical plus ventilation. Running those to the middle of a room — sometimes through a slab or finished basement ceiling — is the single largest swing in cost.
- Countertop material and size. A large island is a lot of square footage, and the jump from laminate to quartz to natural stone shows up quickly on a surface that big.
- Cabinetry. Stock, semi-custom, and fully custom islands are very different builds. Custom lets you use every inch, but it's more hours in the shop and on site.
- Structural and electrical work. Older Long Island homes sometimes need floor reinforcement under a heavy stone island, or panel and circuit upgrades to support new appliances.
- Layout changes. If fitting the island means moving a wall or relocating existing plumbing, that's a bigger project than dropping an island into space that already exists.
Because every one of those depends on your specific kitchen, we don't quote islands from a photo or a phone call. We look at the space, talk through how you cook, and put a free written quote in your hands. Call (631) 983-8079 and we'll set up a visit.
A well-designed island is worth getting right the first time — it's the piece of the kitchen you'll live with most. If you're weighing a bigger project, our kitchen remodeling page covers the full process, and our guide to open-concept kitchen renovations is a good next read if you're thinking about opening up the space around the island. Whenever you're ready, we'll walk your kitchen with you and give you an honest read on what's possible.